Cartography ~ The World Map ~
Part 1
A Feature by DJ Fenix
Maps are a big deal in RPGs. RPGs are essentially telling a story and, after all, all stories need a great setting to work. Regardless of whether it is surreal or realistic, the setting has to flow to work with your story. So it's a wonder how map designs are hugely overlooked when planning an RPG--considering that you're expecting the players to walk through those towns and dungeons. Maps need to be interesting and dynamic, and proper planning will help keep the map from being boring and tedious.
This is the first of a series of map-making tutorials. It will not only focus on level design, but also on graphics and a bit of game design (Because after all, good map-making also needs to appeal aesthetically). This particular article will take a look at the world map. This will be a two part article, since it is fairly length. But anyhoo, let's get on with it.
Planning
First things first: I can't stress enough how important it is for one to plan their game before doing anything. A lot of newcomers to the RPG-Making world tend to start something, and just append as they see fit. Even if you're just starting out, at least plot out a story or concept. That way, you'll have a direction to move your game towards. Otherwise, you'll just have a jumbled mess. When you play a game, you can tell whether or not the story was planned. Games that do not have a planned story feel linear, even down to the progress of the map. So much so that it feels like you're moving in a dead-straight line. Clearly, that's a bore even just thinking about it.
With that method, authors tend to make a world full of small islands. Although it isn't unrealistic to have such a world, there is an extremely high chance that it will be aesthetically unappealing.
Now, particularly for the world map, planning the story is important. The story helps the characters move through the map. Characters have got to have a purpose for going from point A to B. And once they have that purpose, you can fill in the gaps of the journey taken between A and B. Through this method, you can better plot your land according to your needs, and by putting detours for everything inbetween, you can make your story much more dynamic. To better illustrate my point, I'll break down Dragon Quest 1, an RPG that most are probably familiar with.
| The game begins, you learn about the situation of the dragon lord and the princess.
-First objective, rescue the Princess In order to rescue the princess, the hero has to go to the dragon's cave and slay the dragon, then the hero returns the princess to the castle. -Second objective, defeat the Dragon Lord But before he can defeat the Dragon Lord, he has to get access to his lair via the Rainbow bridge, thus giving the hero more objectives. He has to find the rainbow drops to make the bridge, but he has to find the tools to make the rainbow drops. But before that, he needs to find the treasures to trade in to get the tools to make the rainbow drops. Then he can finally build the bridge then kill the dragonlord. |
Really, that's it. Because there were only two main goals of the game, every other aspect of the game were simply sidequests. And really, the game would've been fine if you didn't need those extra treasures to build the rainbow bridge, but it was a place to just throw in a detour to add some flair.
Now, in terms of the geography, not much was really needed. First, you needed the main castle, then you needed the dragon's cave, and lastly, you needed the dragon lord's castle. The creators could've easily placed those 3 locales anywhere on the map they wanted to, but they made each a far distance apart in order to give the feel of a long journey. They then threw in towns along the way to each of these important places to act as pit stops. Lastly, they threw in a slew of extra dungeons and towns to give sidequests for the hero--detours from the main quest. In some cases, getting to these new places would have obsticals of its own, say a cave to get to another town, thus providing detours within the detours.
The main quest would be boring all by itself. Take away the other towns and dungeons, then you'd just have an island with one castle, one cave, and one final dungeon. You'd have one big map with no reason to explore the rest of the land. Put back the extra towns; put back the extra dungeons. You'd then give reason to explore.
Before I move on, I'll give another example, something more complex. Let's break down Final Fantasy 6. Because I'm sure practically everyone is familiar with this, I'll spare the specific details, and break it down by location alone.
|
-Terra and two soldiers go to Narshe (to grab the esper)
-Terra and Locke go to Figaro Castle (after a slew of events) -Terra, Locke, and Edgar head to the Returners Hideout Detour -They head through the caves between Figaro castle and South Figaro -They get to South Figaro, meet Shadow, learn of Sabin -Cut through Mt Koltz, recruit Sabin -Finally make it to the hideout -Next objective, meet up in Narshe Detour -Sabin's Scenario -Banon's Scenario -Locke's Scenario -Meet up in Narshe etc. etc. |
My point is, the story is very linear, but by mapping out your story according to destination, it'll be easier to ensure that your map isn't. But in order to do this, it's important that you plan out your main story first. That way, incorperating sidequests will be easy, and it'll definitely help you in making your map.
But enough with the rambling. Let's get on to the good stuff.
Tools of the Trade
I've said above that some authors would tend to make games with a world filled up with small islands. While there isn't anything wrong with that, it'll take some amount of skill to make that game enjoyable (there's only two games I've enjoyed with said worlds: Zelda: Wind Waker, and Chrono Cross, both of which have horrible world designs but excellent gameplay). But when you're creating a map for your own game, it's important to take your story into consideration. Does your story call for large continents, or does your story call for many islands? It doesn't even have to be an entire world. Your setting could just take place on a single island, or even just a country situated somewhere on a larger continent. Regardless of what it is, plot it out. Because Zelda:WW's gameplay was based on sea travel, and the mythology called for a collection of small islands, the world map worked for the game. For Chrono Cross, the water simply provided a border to prevent players from getting to certain areas before they needed to. So whatever your story calls for, provide for it accordingly.
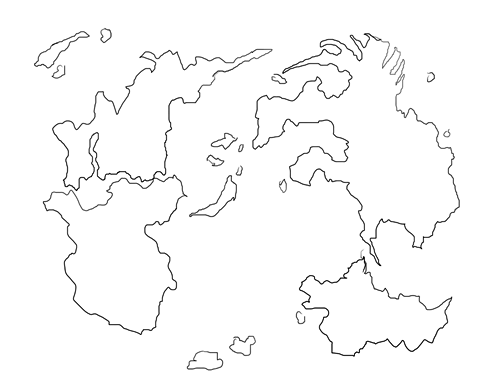
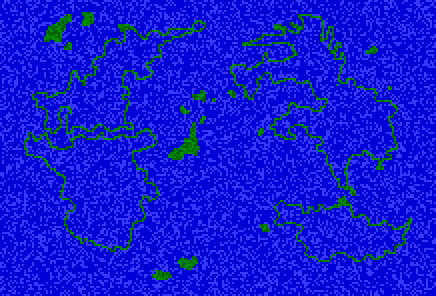
For the game that I'm making (for the tutorial, really, heh), my only specification was for two continents and a big lake somewhere in the world. One continent has a war going on, and the other simply frowns upon it. That's it. So first I would plot out my land on paper (because drawing the land first on OHR would probably make it look unnatural). It's not vital, but it would help to know a little bit of geography and land formations. Anyways, above is my sample world. It meets my specific needs, but I also threw in extra islands and another continent in case I feel like using it later. Note that the lands aren't smooth. It's rough and looks natural. There isn't any special technique to drawing this, I sort of just drew it at random with the specifications in mind. With that having been said, there aren't really any tips I can give you for drawing a map, expect to make it big and try to avoid straight and smooth lines. And note that I don't have landscaping as of yet.
Next. Now that we have a map to work with, we can move on to the OHR. Any good cartographer needs drawing tools, and since we're making RPGs, our tools are our tiles. It will help if you make all of your tiles before you make your map, because then you dont need to go back and forth between the map and tile editor.
The first tile is the grass tile. To be honest, there's nothing really special about the grass tile. You have to take into consideration that you're viewing the world from miles above, so there's hardly going to be any details. It's not like you're gonna see a single blade of grass from that high up. Several shades of green splattered together would be fine, but don't use too many shades. I typically use three shades, but even two would suffice. Four shades would be borderline for me. Any more, and you're just gonna have something that looks tacky.
 |
An ice or snow tile, should you need it, is exactly the same thing, but try to do even fewer shades with the snow. If you ever take a look at a field of fresh clean snow, all you see is white anyway.
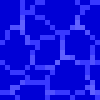
Next is the water tile. You could easily just do the same thing with the water tile as you did the grass and it'd work just fine. Do it a few more times, and then you'd have an animated water tile.
 |
... but that'd be too easy. It looks fine, but I'm sure we can do a lot better.
When you think of water, particularily with the ocean, you think of waves. And since the water is moving in all directions, you can't really have waves in a perfect straight line. You've got to have the waves moving in all directions as well, so that's what I'm going to go with.
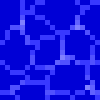
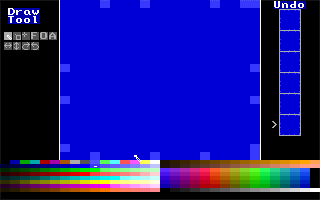 | I'm going to start with a basic blue fill, and because I'm going to draw waves, I'm going to need lines running across the whole tile. Because it's a tile, I'm going to need it to be able to connect to itself so that it runs continuously and smoothly, ensuring that it doesn't look blocky and hiding the fact that it's actually a tile. In order to ensure it connects, I mark off the points that it will connect with a blue two shades brighter. |
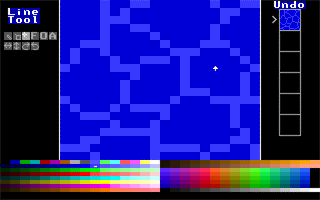 | Next, I take those end points that I've marked off and randomly connect them. Don't just connect them directly, though. Make it natural. Have them weave into each other. Make the lines intersect. The end result probably won't look that pretty, but don't worry too much about it. Your only concern right now is to make sure your tile looks good when you put a bunch of them together on a map--making sure that it flows together. If it looks sort of clunky, try to fix it later. It's still early in the game, so it wouldn't hurt if you wanted to try again. |
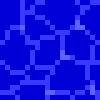
Once you have something you're happy with, you could take that tile and copy it 3 times. For each of those copies, just rotate it to a different position. This makes it easier to animate your tile. You could take the finished tile and just rotate that, but the shading would be off for those 3 copies. It'd be best if you shaded each rotation separately.
 |
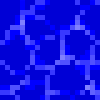
 | Next, take a blue two shades brighter than the blue the lines are made of and just highlight some of the intersecting lines. Those intersecting lines are essentially the peaks of the waves, so make them bright. |
 | Go one shade down and colour in the lines surrounding the highlighted areas, and highlight more intesecting lines. |
 | I felt that the highlights weren't bright enough, so I took a pretty bright hue of blue and accented the already highlighted areas just to make it pop up a bit. |
 | I took a blue one shade down from the original shade of the line to smooth it out. I drew over some of the existing line and coloured in some of the edges of the base colour. |
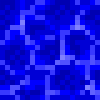 | Lastly, I took a dark blue and shaded in the base blue. I picked one side of the base to be darker (in this case, the top left) and outlined the edges to simulate the shadows of the waves being projected onto the floor. Then, I dithered whatever was remaining. |
Do the same for the rest of your water tiles, and then you have a great looking water animation. (Note: I like to make the first tile of my world tileset be the water. That way, when you finally do the map, you dont have to waste your time filling the whole thing with water.)
I'll cover the rest of the tiles in the next article. But for now, you have enough to at least plot the shape of your land.
Plotting the Land
Now that we have the tiles ready, we can start drawing the map on the OHR. If you're doing an entire world, then you'd probably be better off doing as large a map as possible. That way you could fit more details on the map, and the size alone would make it feel more like "the whole world".
Because my first tile of the set is water, I don't have to spend hours and hours filling up the whole world with water: it's already done for me. So all I have to do is draw the land. At this point, I pull out my trusty drawn map. And, personally, I like to follow the drawing as close as possible, but that's not necessary. The drawing is more like a guideline anyways. Regardless of how closely you follow the drawing, I find that having an actual drawing of your world helps make an overall better looking world.

What you want to do first is draw an outline of your world with the grass tool (given that most of the land in your world is land). Then just fill it in. It's a simple, but tedious task, but shouldn't take too long. Once you get that done, voila! You have a world. Granted, it's full of blocky grass tiles and has nothing else, but nonetheless, it's a start.
That's all for now. Next time, I'll wrap up what I began and include a bunch of more tips and techniques.