Animation Scripts: Making Life Easier One Script at a Time
A Feature by Jeremy Bursey
Download Test File Here

Introduction:

Well, now that you’ve seen extensive sprite animation at work in Tightfloss Maiden, I thought I’d offer you a chance to implement that level of quality into your own game by using a handful of pre-made scripts I designed for making sprite animation easier.

These scripts are written in old syntax. But if you import them directly as written, their usefulness won’t be affected.

Also, before I get into the discussion, I just want to extend a special thanks to The Mad Cacti for streamlining my original scripts to make this more user friendly. Most of the complex stuff (like the “mod” commands) came from his brain. Due to his patience, I finally understand how “mod” works and how much better it has made this plotscript. If you haven’t learned it yet, learn it soon. The function is made of magic.

The Scripts:

Using these scripts will save you a lot of time if you want to create extensive animation but don’t want to type out “set hero direction (0,north) / set hero frame (0,0)” over and over.

To see everything I’m about to discuss in action, check out the included “Bug Test File.” Just walk the hero south two tiles and the rest will play out for you.

The commands:

hero animation (who, picture, palette, cut frame, ticks=2, hold=0, start frame=1, reverse=0, break frame=0, launch script=0)

or

npc animation (who, picture, palette, cut frame, ticks=2, hold=0, start frame=1, reverse=0, break frame=0, launch script=0)

will do everything that writing “set hero direction, etc.” will do, and more, but accomplish it in one easy line.

Here’s how it works:

First you’ll want to include the master file “animation scripts.txt” at the top of your plotscript file where “include, plotscr.hsd” and your official GAME.HSI are located (make sure the text file is in the same folder as the rest of that stuff).

Then you’ll want to draw all the frames of animation relevant to the action you’re attempting to show. This is the time consuming part.

Make a mental note of which walkabout set begins the animation.

Now you’ll want to plug in the numbers.

Keep in mind that the command for “npc animation” uses all the same arguments as “hero animation” (though the first argument is limited to the NPC ID--this should be obvious, but I’ll mention it here in case it’s not).

Also, while the NPC animation script allows for NPC referencing (individual animation of NPC copies), it is not as effective at it as it is using unique NPC IDs. You’ll find that all copies of the same NPC, while able to animate individually, will still change pictures together. Use extreme caution if you’re gonna attempt to animate an NPC with multiple copies.

Also, these scripts assume that you’re animating one sprite at a time. Different measures will need to be taken if you’re trying to animate more than one sprite at once.

Note: In the animation script (the one you’ll need to include if you want any of this crap to work), you’ll find a (--1) next to the “start frame” argument. This is because, internally, the first frame is actually zero (as opposed to “1,” which this script assumes), but I wanted to make it easier on the designer to count how many frames he needs. I only mention this in case you want to figure out how all this stuff works, or if you want to change the structure of the scripts to perform some other tricks.

Okay, enough digression, let’s start examining these arguments.

A Breakdown of the Simple Numbers:

We’ll start with something easy.

Let’s say you write out the command: “hero animation (0,257,0,22)” What do these numbers mean?

Let’s explore, shall we?

Keep in mind that the first four arguments are required. Also remember that these alone will give you a nice singular animation worthy of a lengthy plotscript.

The first argument: Hero in Caterpillar Party.

The “0” in the first argument assumes that you want to animate the hero in caterpillar party slot “0.” Pretty self-explanatory. If you know anything about plotscripting, you’ll know that you can assign any hero numbered from 0-3.

You can also substitute the number with a variable assigned to the hero of your choice using “rank in caterpillar (hero:name).”

The second argument: Hero Picture.

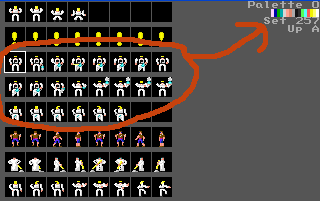
This is the numbered walkabout set containing the first frame of animation. In this case, Set 257 will initiate the animation.


Note: By default, the script will automatically revert to the hero’s starting picture, frame, etc. when the animation is finished. Keep this in mind if you’re looking for a different effect when it’s over.

The third argument: Hero Palette.

Normally, this should be the same number as the default hero palette, but sometimes exceptions are needed. This is where you’ll make that exception...if it’s needed.

Note: A number is required here.

The fourth argument: Cut Frame.

The next argument tells the script how many frames of animation it needs to use. In this case, the script will run through 22 frames of animation before ending.

Note: The attached “Bug Test File” goes up to 24 frames, but the script itself has no limit.

And this concludes the required fields.

Simple, effective; your multicolored smiley face can now switch through all eight shades of the rainbow and return to normal in just four arguments, and all you have to do is write out a single line. No more paragraphs of “set hero direction / set hero frame.” It’s quite revolutionary.

But what if you want the smiley to hang on the last color? What if you want it to walk away in anger after turning red? What if you want it to come back and finish its display of emotion before apologizing to the player? Perhaps the first four arguments aren’t enough.

The remaining arguments will give you greater control over your simple animation.

The Bridge:

The fifth argument: Ticks of Animation

The next argument is a bridge between the basic functions and the complex ones. While technically required, the script covers the necessary field for you, so you only need to plug a number here if you want to change the default value.

hero animation (0,257,0,22,3)

Here you’ll decide how many ticks separate each frame of animation. In the above example, the animation will run at 3 ticks per frame.

Note: The default is set for 2 ticks. I find that this provides a fluid animation without going too fast. Most of my animations are set at 2.

Breakdown of the Complex Numbers:

What if you’re looking for something complex, something that involves special tricks? Well, you have five additional optional arguments at your disposal to help you fine-tune that animation.

The sixth argument: Hold Frame

hero animation (0,257,0,22,3,true)

The first of the fine-tuning optional arguments, the “hold frame,” allows you to freeze the sprite on the cut frame, rather than revert it to its original picture. This is useful if your hero sprite draws a sword and holds it on an enemy for a couple seconds before the fight begins. You’ll need to write “true” if you want the frame to freeze.

Note: Argument defaults to “false.” If you leave blank or write “false,” the sprite will automatically revert to its pre-animation state.

The seventh argument: Start Frame

hero animation (0,257,0,22,3,false,4)

The next optional tells the script which frame begins the animation. Normally this should default to 1. But if for any reason you want to start in the middle of the animation (like if you’re making a character dance and his set includes three different poses), this is the argument you’ll want to use to specify the first frame. In the example above, the animation begins at frame “4” (east,1 of the first walkabout set) rather than frame “1” (north,0 of the first walkabout set).

Note: Each prior argument needs to be accounted for to avoid screw-ups. Therefore, if you want to start the animation on a frame other than the first but don’t want the script to end on a freeze, you’ll need to assign the default “false” to the sixth argument. Likewise, if you use the eighth argument, but want to start on the first frame, you still need to assign “1” to this argument.

The eighth argument: Reverse Animation

hero animation (0,257,0,22,3,false,4,true)

This one’s a bit tricky, so you’ll want to pay attention to your numbers before you use it.

Just as it sounds, this is the argument you’ll need to use if you want your animation to run backwards. All you have to do is write “true” and your last frame will become your first, and vice versa.

But be warned: Your start frame and cut frame arguments should not be reversed. If you switch the numbers and set the reverse argument to “true,” nothing will change.

Assigning the “reverse” bitset will turn a cut frame of “10” and a start frame of “4” to a start frame of “10” and a cut frame of “4.” Be careful when you use this.

Use “false” or leave blank if you want the animation to continue forward.

The ninth argument: Break Frame.

hero animation (0,257,0,22,3,false,1,false,12)

Okay, here’s something new for you to chew on. What, pray tell, is a “break frame?” This is the frame you’ll use to interrupt the animation in case you want to perform some new trick. If you’ve played Tightfloss Maiden, you’ll notice that the Unknown Woman pauses mid-animation when she pulls a treasure lid off its box. This happens after a break frame. While her animation will continue to the end, there has to be a spot where the script removes the treasure lid. The break frame signals when that’s supposed to happen. In the example above, this will occur after the 12th frame of animation.

To use the break frame effectively, you’ll need to utilize the final argument. Using the break frame without the last argument is actually kinda pointless.

The tenth argument: Launch Script.

hero animation (0,257,0,22,3,false,0,false,12,@treasure box)

The final argument, the Launch Script, triggers whatever’s supposed to happen after the Break Frame kicks in. Though Tightfloss Maiden uses a slightly archaic system to accomplish the treasure box pull (before TMC submitted his modifications, I was basing this off a “Launch Code” system which assigned a number to a master “footnotes” script and required a lot more user input than it does now), the above line accomplishes the same trick in simpler form. Simply put, @treasure box (or whatever you choose for this argument) is a constant that uses a script ID that calls for the desired plotscript. If you’re familiar with timers, then you’ll know what this does. In this case, a script called “Treasure Box” runs after the break frame.

Note: The Cut Frame, not the Break Frame, ends the animation. If you want the animation to stop immediately after the breaking script finishes, make sure the Break Frame and Cut Frame are the same number.

Also, if the cut frame has a higher number than the break frame, the animation will continue after the launch script runs. Keep this in mind if you decide to move your hero elsewhere during the launch script.

And lastly, don’t forget that the hero will still be in his “animated” walkabout state when the launch script triggers. If your script calls for movement, you might want to temporarily revert him to his original picture (or to a new special walkabout set) before the action starts.

Conclusion:

So that’s how to use the animation scripts. This should hopefully ease your scripting time if you’re looking to make detailed, fully animated presentations.

Also, if you want to maximize the usefulness of “hero animation” or “npc animation,” you’ll want to double up on the commands to perform outrageous tricks.

For example, to make a hero dance, you might want to start at the first frame, end on the sixth frame, go backward by 2 frames, hold the pose for a few ticks, then cycle forward to the tenth frame, go back to the sixth frame, etc., until the dance finishes.

In a script where the first dance frame begins on walkabout set “4” and utilizes two full sets, this would look like:


script,human,begin
hero animation (0,4,0,6,2)
hero animation (0,4,0,6,2,true,4,true)
wait (10)
hero animation (0,4,0,10,2,false,4)
hero animation (0,4,0,10,2,false,6,true)
hero animation (0,4,0,16,2)
set hero picture (0,0)
set hero direction (0,north)
end

Note: The animation scripts will always default to the picture, direction, and frame of the hero (or NPC) called prior to beginning the animation. If you layer the animations, as I’ve done in the example above, you’ll want to rewrite the original default hero commands (like “set hero picture”) after the dance is over; otherwise the hero will revert to the last frame of the last animation command (which would leave him in his dancing state when the script ends), unless, of course, you end on a freeze frame.

And with that, enjoy.