Pixel Art
Rocks and Stones
A Feature by DJ Fenix
Rocks and stone textures are one of the harder things to draw, but the existance of rocks in games are virtually inevitable. Rocks will be everywhere, the past, the present, the future (and post-apocalyptic future, no doubt)--even space has meteors and asteroids. I've noticed that a lot of OHR games take the easy route and simply use an airbrush for a rocky texture, or draw a circle with a gradient fill for a rock. Sure, their practical, but they're nowhere near aesthically appealing. But with a little more work, and (hopefully) with this tutorial, OHRers will be able to have a better ability to draw rocks and such, and ultimately, stop using those ugly, ugly, ugly gradient fills.
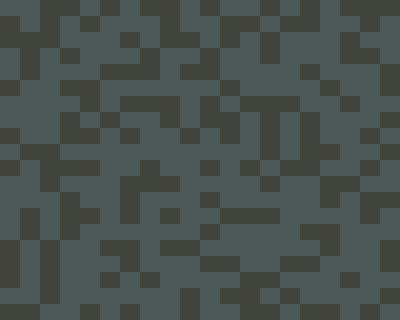
The first step is to take a look at how lighting works for bumbs and indents on surfaces.
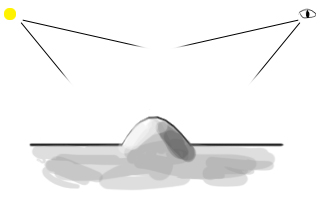
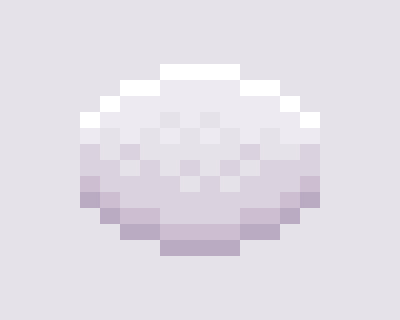
This first image shows how lighting works with on a bump on a surface. On the top left is the light source, and the top right is the view of the player. We can see that the highlights on the bump are closer to the light source, and the shaded area where the light source does not reach is closer to the players view. This essentially means that if you were to draw this, the light would be closer to the top of the screen and the shading would be closer to the bottom, which would look like this:

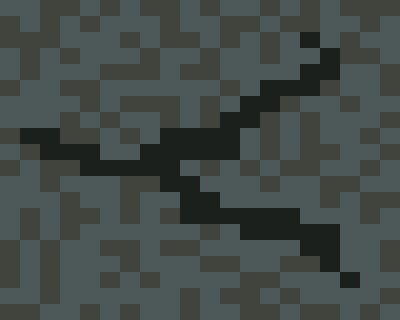
The lighting on an indented surface would be different. It would look something like this:
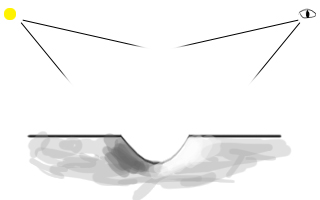
From this, we see that the highlighted area is now closer to the player, and the shaded area is closer to the light source. And if this were to be drawn, the shaded area would be closer to the top of the screen, and the lighted area would be closer to the bottom. This looks like this:
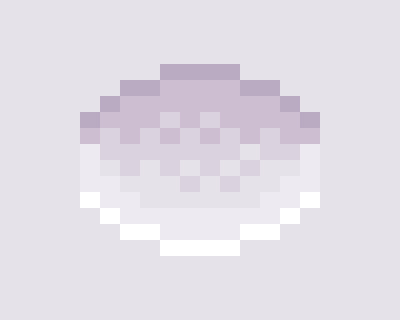

Pretty much all I did for this tile was invert the shaded and light area, and that makes it look more like a hole in the ground.
How does this relate to stone textures, though? Well, a rocky texture consists for thousands of indents and bumps on a surface. This is why the airbrush works well with this type of texture--you can randomly put in dark and light spots and make the illusion of tiny bumps and indents.
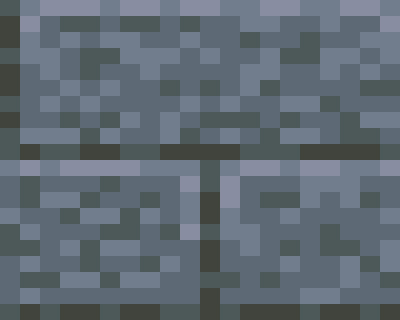
But because these indents and bumps are so small, there won't be a lot of contrasts with highlights and shaded areas, which is why the number of colours should definately be limited when airbrushing. I've seen people use 5 or more colours when airbrushing a rocky ground. This is a big no-no, because so many colours and contrasts makes the tile look extremely tacky and fake. I have a tendancy to use only 2 colours, and maybe sometimes 3, but no more! A simple rock texture for me would look like this:

It simple, and it gets the job done. Plus, it looks a lot better than using a whole bunch of different shades.
Stone textures aren't just indents and bumps, they also consists of cracks. But it wouldn't really suffice to draw a black line across a texture and call it a crack. Once a crack is made on a surface, the lighting effect changes on the surface too! Drawing a black line looks more like a marker stain, but if you add lighting to the crack, it looks more like a crack.
  | Starting off with that original stone texture, I simply drew a black line indicating where I want the crack to be. |
  | Next, I took one shade up and highlighted just below the black line. I did this because essentially, a crack is one long indent on a surface, so the lighting would appear below the shaded area. |
  | I then took a darker shade and shaded in a small area above the black line. |
  | Lastly, I added some extra shades of colour on the highlighted and shaded areas so it looks a little less smooth and more rigid. In total, I only used 5 colours. |
The method above is the base of everything else to follow. You can use the same method to make cobblestones, brick walls, and any surface that has a tile-like structure to it.
So the next example will be a brick wall.
  |
Rather than starting off with the actual stone texture, I like to plot out exactly what my pattern will be. As I mentioned earliar, this is a brick wall. And I also want to make sure that if I piece a whole bunch together on my map, it looks cohesive and doesn't look out of place. 
|
  | I take one shade up and highlight below the dark lines and also some along the side. |
  | Next, I randomize the highlighted area and shaded area by adding extra shades of colour, again, to make those areas less smooth and more rigid. |
  | Lastly, I do the same with the larger surfaces. Of course, you could skip this step if you wanted your bricks to look perfectly smooth. |
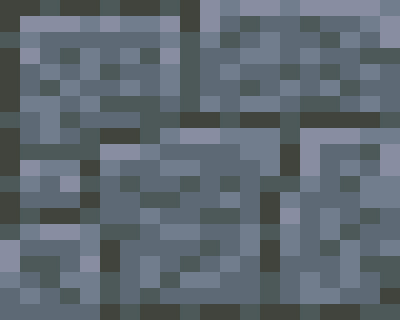
And, as always, whenever you finish a tile, you want to piece a bunch together to make sure they connect well.

Bricks are easy to do. You could spice it up a little and make the stones uneven and make it look a little more interesting.


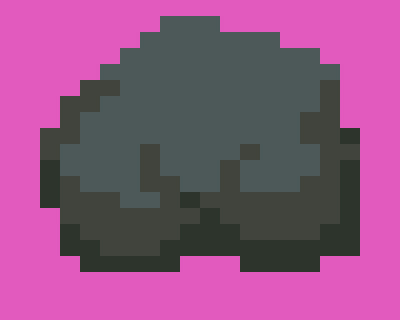
Rock textures are great and all, but it's the actual rocks in nature that are seen more often in games. Not all games are going to have processed stones to build houses or what not. You're game might be futuristic with metal as your main material of choice, but there will always be caves and stones lying around in the world.
So what we're going to do next is an actual rock:
  | I start off with the main colour of the rock. It's a mid-tone, so I'll add brighter shades and darker shades to this. With this, I just draw a simple shape for the rock. I can be any shape, really, since it'll be the detailing that follows that make it look nice. |
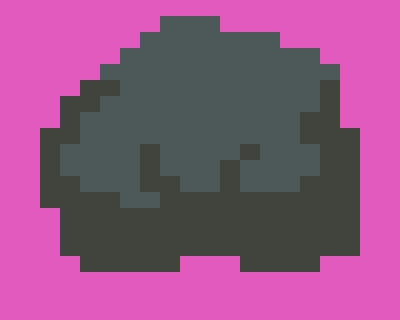  | I then take one darker shade and shade in the lower part of the rock. I don't really have any advice for this except to follow basic shading techniques. |
  | Another shade darker and just shade in the bottom of the rock. This gives makes it stand out and have some contrast to it. |
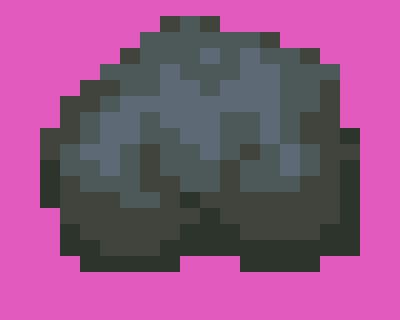  |
The I add some highlights around the middle. I don't add any highlights right at the top because the rock is curved on that side, so it should be darker. And after adding the highlights, you could really leave it at that. Leaving it like this would make the stone look smoother, as the shaded areas are cleaner to give it that effect. |
  | But if you want to make the stone look a little rougher, simply randomly throw in a darker shade throughout the image. This is my technique that I use with all my rocks. |
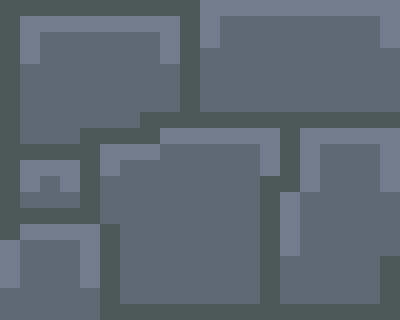
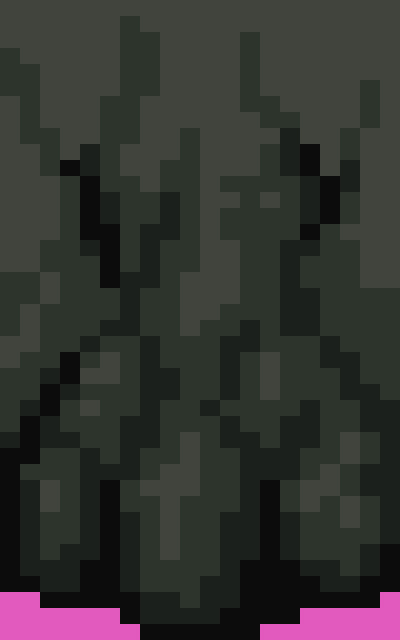
Now that we know how to draw a rock, we can take that rock and pile them up to make walls for caves. The way I look at it, the walls in a cave are simply a bunch of rocks stacked on one another, or even just one big rock. But nevertheless, if you look at some of my newer cave tiles, it's essentially rocks on top of rocks on top of more rocks:
  |
To make my walls look a little less monotonous, I have more than one tile for the wall. This one in particular is two tiles high, but I've had cave walls that were 5 tiles high before. Making larger cave walls will make your cave seem more massive. But of course, in terms of a balance of function and aesthetics, two tiles will suffice.
So, I start off with my base colour. And with another colour that stands out completely, I basically trace our where my prock placements will be. You could have the same sized rocks piling over eachother, but in this one, I had them made smaller in the bottom and slowly blend into the walls at the top. And, again, I just piece them together to see if it works as a tile. 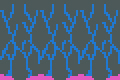
|
  |
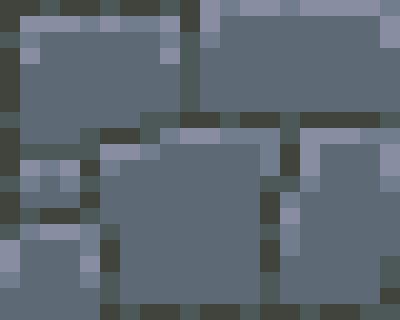
I realized that the shade that i started off with is much too bright. I have the intention of making a dark cave, so obviously, make darker shades. If you're aiming for realism, use darker shades unless there's a good source of lighting.
So, I work from the bottom up, starting off with my darkest shade--black. I only really trace over my outline on the bottom because that's where the darkest part will be. You don't have to use too much--that'll look tacky. You can adjust it later if you feel you overdid it. But just put enough so that it'll stand out from the ground, really. I also threw a little bit on the top half of the tile. What this does it's make it look like the wall is cracked and worn, similar to the crack on the floor that I did in the beginning of this article. |
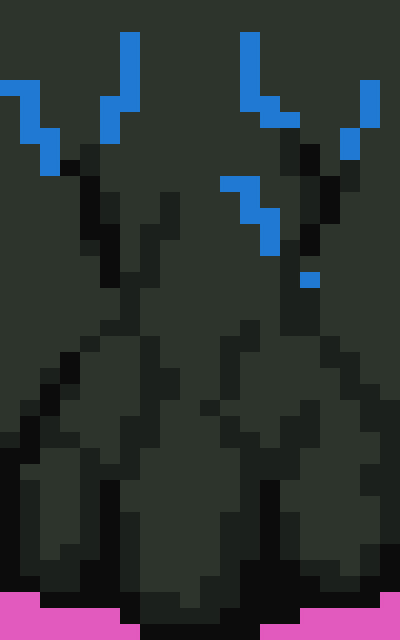  | Taking the next shade up, I continue working on retracing the blue outline that I had. I also take this opportunity to use that same colour to shade in the rocks on the bottom of the wall. |
  |
The next shade up is actually the base colour that I started with, so I take the next shade up after that.
Starting on the bottom half of the wall, I just highlight the rocks, making sure I have only one shade darker all around and nothing darker. There isn't any real tactic to this, as I mostly do this without any thought. And if you haven't noticed, I'm trying to make it darker on the bottom and have it gradually become brighter at the top. There isn't any reason behind this, nor does it make any logical sense. But the fact that in most caves in games, you can see the wall despite not having any light source, so I don't think it really matters. It's just for looks. So, because of this, I realized that the top half of the wall is too dark, so i just change the base colour to a shade brighter. |
  | And with the shade that was just replaced at the top half, I finish retracing the outline, making sure to add excess around the darker colours for shading. |
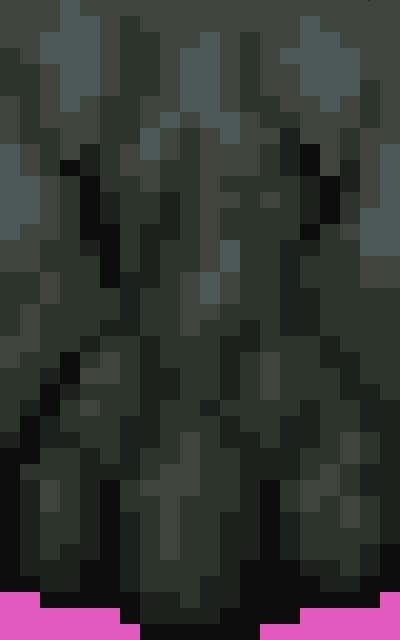  |
And at last, I take the next shade up (which would now be the brightest shade) and simply highlight the top half of the tile. Again, there isn't really any thought process behind this.
WIth that last shade added, the tile is finished. Then I piece them together and make sure that it links properly and just try to touch up any parts that look off. Not including the pink, only 5 colours were used. 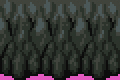
|
Well, that's all I can come up with now; I hope this was helpful. If you have any questions, just message me on Castle Paradox, or Slime Salad.